How to Build a Mesh Network via Omada EAP in Controller Mode
Note: If you want to know the difference between Omada Mesh VS Deco Mesh VS OneMesh![]() , click here to know more information
, click here to know more information
Mesh is used to establish a wireless network or expand a wired network through a wireless connection on the 5GHz radio band. We can use Omada EAP products to build a mesh network for indoor and outdoor places together.
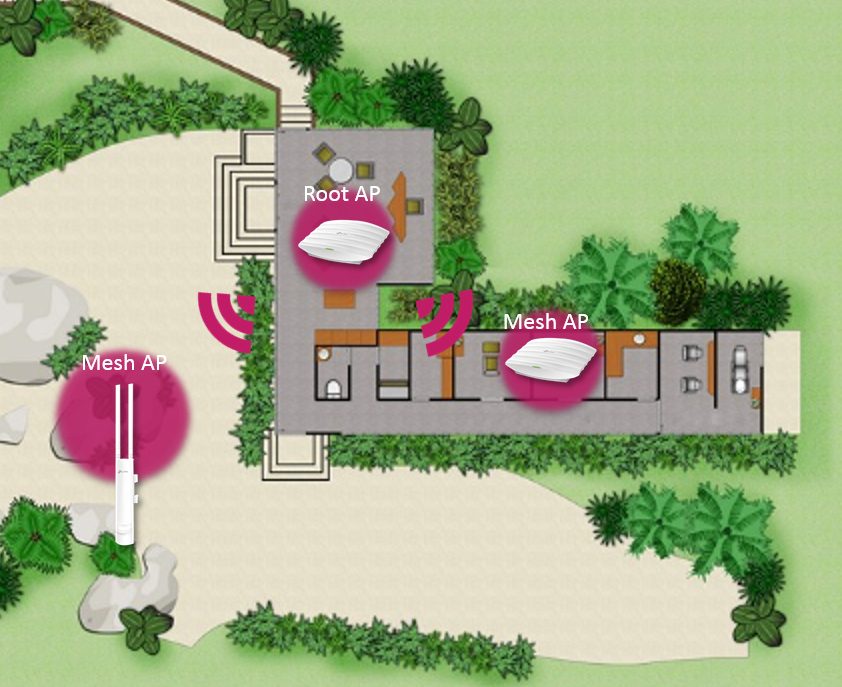
Here is an example of how to build a Mesh Network in a home scenario via indoor and outdoor Mesh EAP.
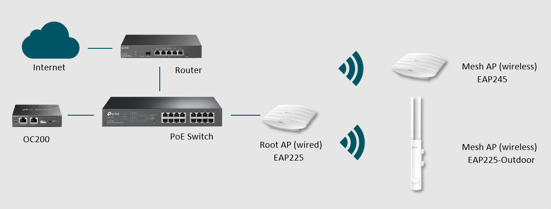
Network Topology
We are using EAP225, EAP245, and EAP225-Outdoor to build the Mesh network. The EAP225 connect with PoE Switch works as the Root AP. The EAP245 and EAP225-Outdoor connect with EAP225 (Root AP) wirelessly as the Mesh AP.


Configuration steps
- Following the topology to connect the devices. Power on the EAPs and OC200 (you can also use a software controller) via PoE adapter or PoE switch.
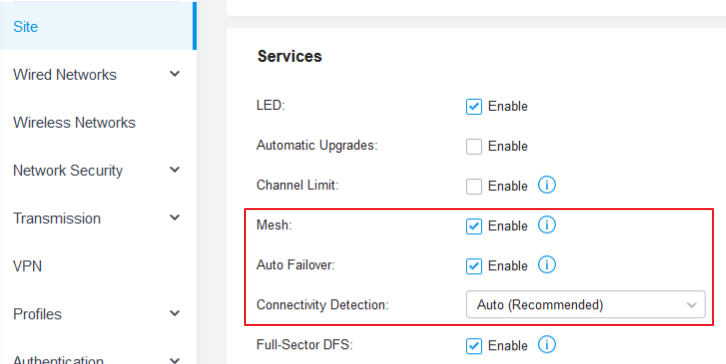
- Use the IP address of OC200 to log in to the management page. Go to Settings-> Site to enable the Mesh function. (It enables by default)

- Go to Device page. And you can find the EAP225 (Root AP) in the pending list. Click the “adopt” button to adopt the EAP225.

- After adopting the EAP225, the Controller will find other wireless EAPs automatically. Click the “adopt” button to adopt the EAP245 and EAP225-Outdoor.

Note: If your EAP225-Outdoor(Canada) isn't detected by Controller, please check the 5G channel on the root AP and ensure it works on Band4. More details can be found here.
- After 3-5 minutes, the EAP245 and EAP225-Outdoor will get an IP address from DHCP Server and connect with Omada Controller automatically. Just enjoy your Mesh network!

Note: You need to use Omada Controller to configure the Mesh function. The Omada EAP will disable the Mesh function by default if it works in the standalone mode.
Is this faq useful?
Your feedback helps improve this site.
TP-Link Community
Still need help? Search for answers, ask questions, and get help from TP-Link experts and other users around the world.


